Restoration of a Mud Mortar Cottage
23rd August 2016
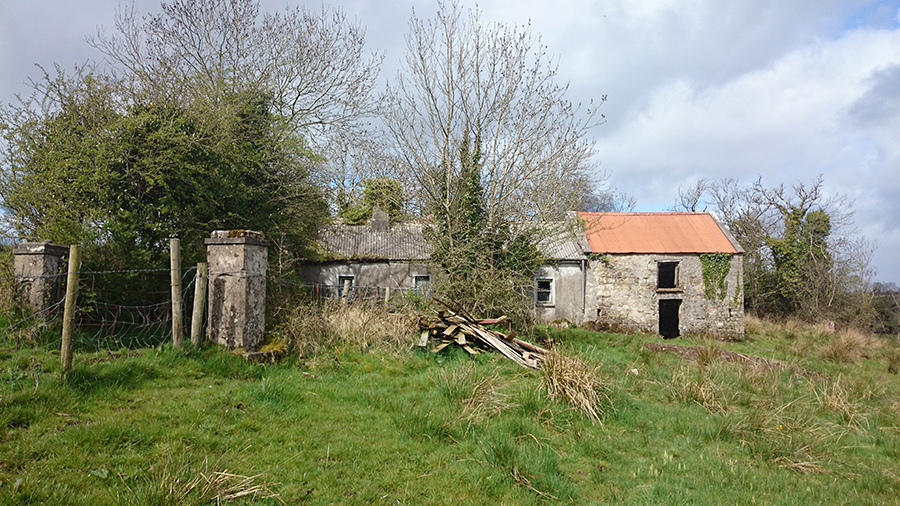
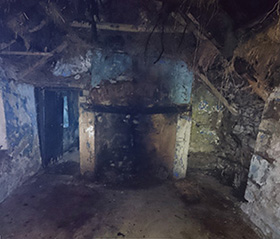
This cottage is nestled on a sloping site close to the village of Riverstown in Co. Sligo. Abandoned 65 years ago, the buildings have remained relatively pure, albeit in a derelict state. The new owner, who is actually a descendant of the original homesteaders, was keen to restore the cottage sensitively. He does not want to live there, but rather preserve the building as a record of how people lived and built in olden times.
The cottage and barn tell a story of expansion (it was extended at least twice and probably three times), of advances in technology (moving from a turf fire built off the floor to a coal-fueled raised grate fireplace) and of changes in style (from ceilings that followed the roof line to flat ceilings). The home also seems to tell a story of an unexpected interest in design and appearances, with an Art Deco style pediment above the front door which matches a surviving wooden headboard, unusual bi-fold doors and a fake fireplace in the "good room".
The cottage is built from stone bonded together with an earth mortar. In conservation, there is a concept that the materials used to carry out repairs should be as similar as possible to the original. In short, replace like with like. This makes technical sense too. As long as the source of the problem can be identified and resolved (e.g. rotten roof timbers pushing out the tops of walls, missing slates and gutters allowing water to pour into the tops of walls and wash out mortar, etc.), using materials that match the original ensure that the repairs will expand and contract, absorb and release moisture, react to salts, etc. in a similar manner. This puts less stress on the repair and it is more likely to survive longterm.
Therefore, it was clear from the outset that this cottage would be repaired using earth mortars. It also made sense that the earth would be harvested from the site, as they must have done years ago. However, it would also be important to ensure that the characteristics of the new earth mortar would match the original as closely as possible.
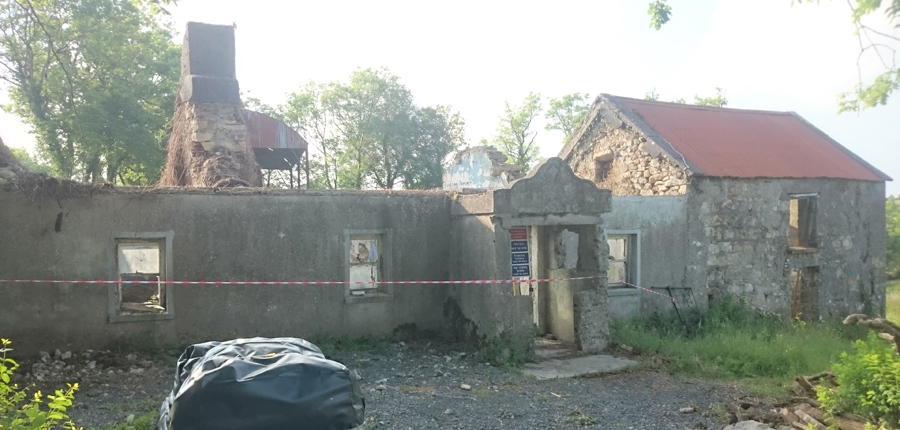
Fig. 2 |
Roof Removed from Cottage |
Samples of existing mud mortar were taken from a number of locations within the walls. The mortar is clearly quite gritty with plenty of small stones evident. There are also some white lumps present, which can be an indication that some quicklime is also present in the mortar.
 |
|
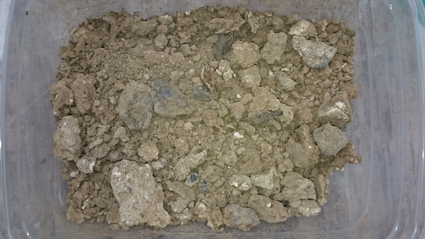 |
Fig. 3 |
Stone Wall with Earth Mortar (and Earth Plaster) |
|
Fig. 4 |
Sample of Earth Mortar |
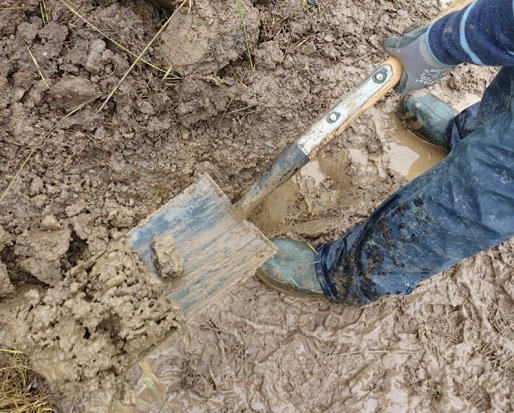
Earth used for building is always harvested from below the top soil (unless you are dealing with turf construction ... but that is a whole other story). You want your building material to be as inorganic and "dead" as possible. You can't build walls with a material that is still breaking down. We took sub-soil from the site so that we could run some tests on it and see if it was suitable for building with. The site was full of rushes and was poorly drained, indicating that there was probably quite a high clay content in the soil. When we dug up the soil, the spade left a shiny, slick mark behind (Fig. 6) - another indicator that there was a lot of clay involved.
 |
|
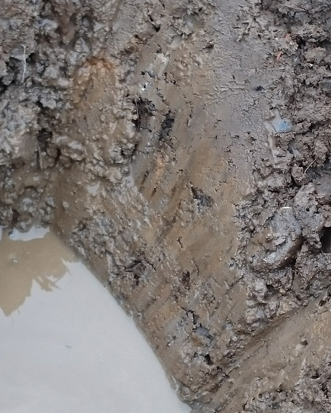 |
Fig. 5 |
Digging Up the Sub-Soil |
|
Fig. 6 |
Slick Surface = High Clay Content |
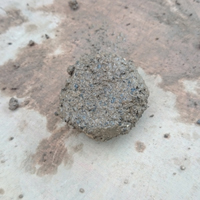
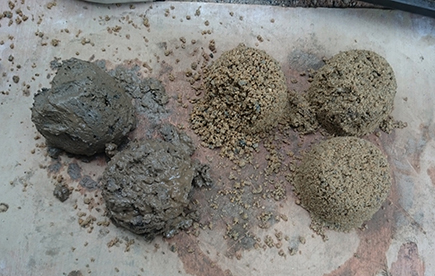
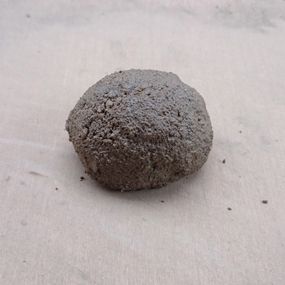
Back at Mud and Wood, I carried out a whole range of tests on multiple samples to see exactly what we were dealing with. The first test was the drop test. A golf ball sized sample of the original mortar was dropped from a height. There was some flattening of the base, but it held its shape well and there were no visible cracks in the ball. This is what we would expect from a good building mix.
After testing a number of original earth mortar samples, I looked at the sub-soil from the site. You can see (Fig. 9) that the golf ball flattened considerably and did not hold its shape. It was sticky and took some effort to peel off the table ... all signs that the sample was too rich in clay to use for building.
 |
|
 |
|
 |
|
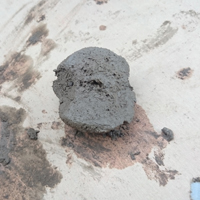 |
Fig. 7 |
Mortar Sample Drop Ball Test |
|
Fig. 8 |
Underside of Mortar Sample |
|
Fig. 9 |
Site Soil Sample Drop Ball Test |
|
Fig. 10 |
Underside of Site Soil Sample |
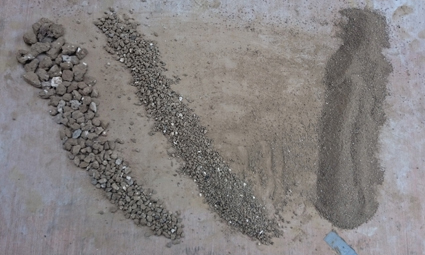
Earth basically consists of two components - stones/gravel/sand/silt (these are all essentially the same thing, just at different scales) and clay. The aggregate (stones/gravel/sand/silt) is the skeleton. This material is inert. It provides the strength. The clay is the binder; it provides the stickiness that glues the material together. For good building earth you need the right combination of both - enough strength and enough stick.
The next thing I looked at was the distribution of particle sizes within the earth mortar samples and in the site sub-soil sample. The mortar samples all featured a significant amount of larger particles, something you might not expect to find with a contemporary mortar mix. There was also a significant amount of fines, between 60% and 70%. The soil sample displayed somewhat similar characteristics, but there was a lack of mid-range particle sizes, particularly in the 4 - 8mm range.
 |
|
 |
Fig. 11 |
Particle Size Distribution - Original Mortar Sample |
|
Fig. 12 |
Particle Size Distribution - Site Sub-Soil Sample |
When considering the range of aggregate sizes within the material, another thing to consider is whether or not they are well graded. This means that there should be some large particles, some medium particles and some small particles. The space or voids in between two large particles can be filled with medium particles. The space in between those can be filled with small particles. The bigger the range of sizes, the more the voids will be filled and the stronger the material is. The void to material ratio in a good mix is 33%. Void ratio tests were carried out for all of the original mortar samples and they all displayed excellent grading, measuring at exactly 33% or just 1 % over or under.
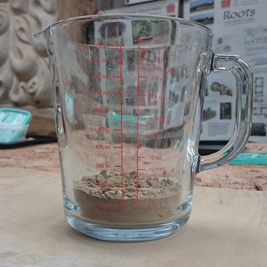
First the material is dried in an oven to remove all moisture. It is then measured (Fig. 13). An equal volume of water is then measured out (Fig. 14). The water is poured on to the dry sample until it becomes completely saturated but no more. This point is reached when the sample is fully wet, but just before ponding would start to occur on the surface (Fig. 16 and Fig. 17). The amount of water remaining in the jar is measured (Fig. 15), which informs how much water has filled the voids, i.e. what is the volume of the voids in comparison with the overall volume of the material.
 |
|
 |
|
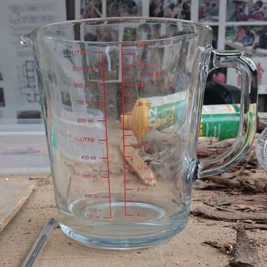 |
Fig. 13 |
Volume of Dried Mortar |
|
Fig. 14 |
Volume of Water |
|
Fig. 15 |
Remaining Volume of Water |
 |
|
 |
Fig. 16 |
Saturated Mortar Sample |
|
Fig. 17 |
Saturated Mortar Sample |
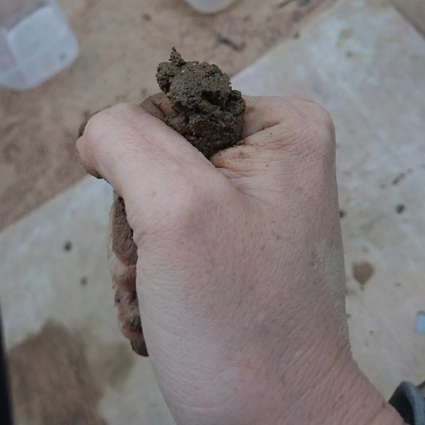
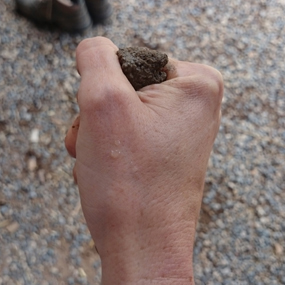
Another test that can tell us about the aggregate and the clay content of a sample is the squeeze test. A sample that has a lot of aggregate will feel really firm in one's hand when squeezed. Under compression, it will not budge. As the amount of clay in the mix increases, the sample will feel more malleable and it will be possible to extrude it (Fig. 18). When the clay content is high, it is much easier to squeeze and it will extrude easily and quickly from one's fist (Fig. 19). A good building mix will feel strong and firm in the fist, but there should be enough give to allow a small amount of slow extrusion.
 |
|
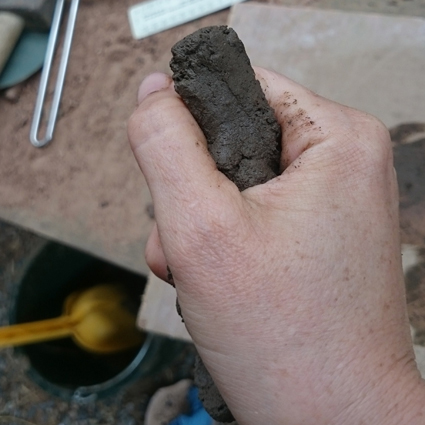 |
Fig. 18 |
Original Earth Mortar Sample - Some Slow Extrusion |
|
Fig. 19 |
Site Sub-Soil Sample - Excessive Extrusion |
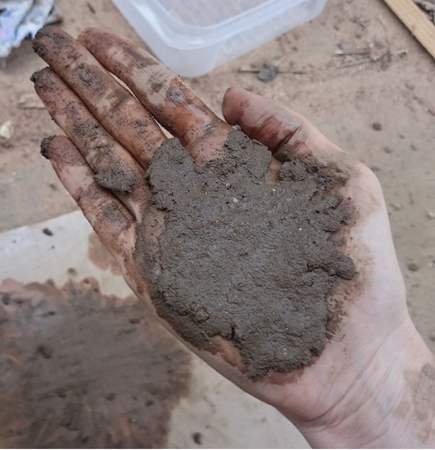
Another test to find out more about the properties of an earth sample is the palm test. This is a favourite of ours at Mud and Wood. The sample is smeared on to the hand about 2 - 3mm thick (Fig. 20), which is then held out horizontally (Fig. 21). Keep the fingers straight, while bending at the first knuckle (where the fingers join the hand) (Fig. 22). Return the fingers to horizontal (Fig. 21). Repeat the move, counting each repetition.
If the sample falls off between 1 - 3, there is too much aggregate and not enough clay. A good building mix will fall off between 4 and 8 counts. Above that and there is too much clay. The original mortar samples were coming in around 7 to 8. The original sub-soil sample came in around 30, clearly much too clay rich to be used in its natural state.
 |
|
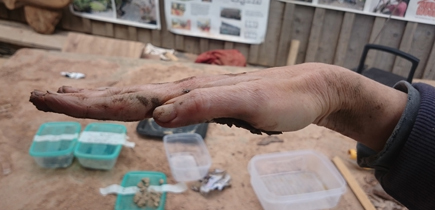 |
Fig. 21 |
Hold Hand Out Horizontally |
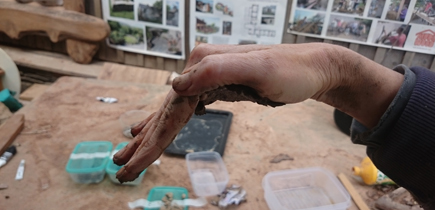 |
Fig. 20 |
Smear on Sample |
Fig. 22 |
Keep Fingers Straight. Bend at Knuckle. |
The results from the tests indicated that the original mortars displayed good building characteristics. However, the samples of earth dug from the site were too clay rich to be used for building. This soil needed to be modified so that its characteristics were in line with the original mortar. In matching the performance of the original mortar, this satisfies the conservation principle of repairing "like with like". It also prevents the repair from putting stress on the original materials or absorbing excessive stress itself. It allows harmony between the old and the new.
High clay content in the soil sample had been established. To balance that out, to provide more skeleton and less binder, additional aggregate was required for the repair mortar. As discussed above, the particle size distribution is important. And we know that the mortar sample contained more aggregate in the 4 - 8mm range compared with the site soil sample. A number of sands and combinations were tried and all of the tests (drop ball test, void ratio test, squeeze test and palm test) were repeated. A mix which incorporated additional coarse sand proved to align most closely with the original mortar. This was no surprise as the coarser sand added to the 4 - 8mm particle range.
 |
|
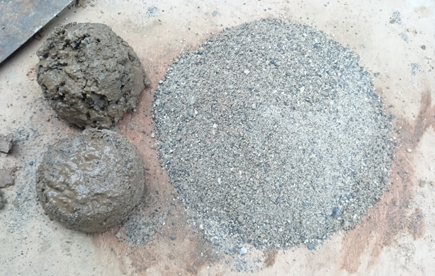 |
Fig. 23 |
2 Sub-Soil : 1 Coarse Sand : 2 Fine Sand |
|
Fig. 24 |
2 Sub-Soil : 3 Local Plasterers Sand |
 |
|
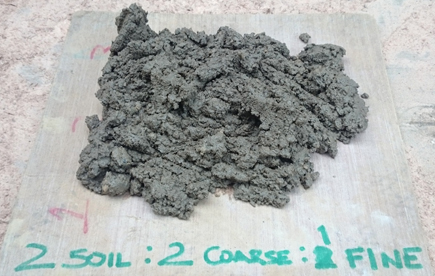 |
Fig. 25 |
2 Sub-Soil : 2 Coarse Sand : 1 Fine Sand |
|
Fig. 26 |
The Final Earth Mortar Mix |
If you look at the ball drop test of the selected earth mortar mix and compare it with the original mortar ball drop test (Fig. 7 and Fig. 8) above, you will notice that the results are very similar. By contrast, I had looked at a sample where I added two parts sand to one part sub-soil and you can see from the ball drop test (Fig. 29) that it could not hold together. Too much aggregate had been added, meaning there was no longer enough binder (clay) to stick the material together.
 |
|
 |
|
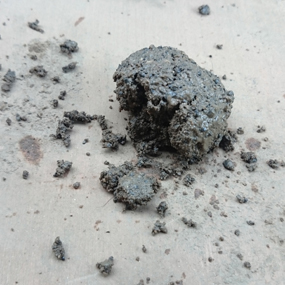 |
Fig. 27 |
Repair Mortar - Ball Drop Test |
|
Fig. 28 |
Underside of Repair Mortar |
|
Fig. 29 |
Sandy Mix - Ball Drop Test |
Likewise, with the selected earth mortar mix, the squeeze test yielded very similar results to those of the original mortar samples (Fig. 18). Whereas with the sandy mix, there was no extrusion at all, indicating that the clay content was lacking in this sample.
 |
|
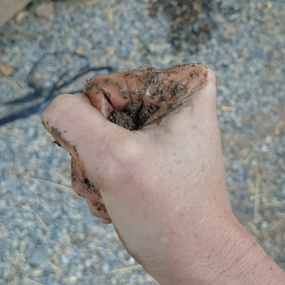 |
Fig. 30 |
Repair Mortar - Squeeze Test |
|
Fig. 31 |
Sandy Mix - Squeeze Test |
The specification for the repair mortar was now known. There was one more ingredient, however. As there was evidence of quicklime in the original mortar samples, a small amount of kibbled quicklime was also added to this mortar mix ... between 2% to 3%.
* * * * * * * * * *
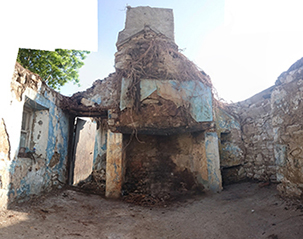
The cottage was in a very dilapidated state. The first task was to remove the roof. It was amazing to stand in a room filled with light which up to now had always been so dark. Then the chimney, which had become destablised by vegetation growth and water ingress, had to be carefully dismantled.
The outshot is a feature of these cottages. It is an alcove which extends beyond the external wall of the building and is situated beside the fireplace and as far away from the front door as possible (typically diagonally opposite, as it is here). A bed or settle was located in the outshot, the warmest place in the house, often reserved for the grandparents.
 |
|
 |
|
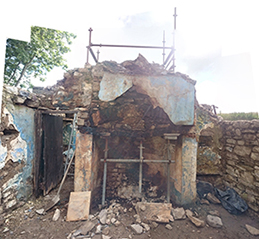 |
Fig. 32 |
Chimney Breast in Cottage |
|
Fig. 33 |
Roof Removed |
|
Fig. 34 |
Chimney Dismantled |
In the photo below (Fig. 35) you can see the remains of bog timber collar beam trusses. Others in the cottage survived relatively intact. Much of the original scraw from the thatched roof remained, along with some lovely examples of straw rope.
The cottage had been extended and modified a number of times. There used to be an opening on the left hand side of this wall, which was blocked up. At high level, there had also been a window, also blocked up. This is evidence that this used to be an external wall and that there had been a sleeping platform in this half of the room. There also used to be another external door opposite the front door (just visible on the extreme right hand side of the photo). This had also been partially blocked up and a window was inserted into the opening (Fig. 36 and Fig. 37).
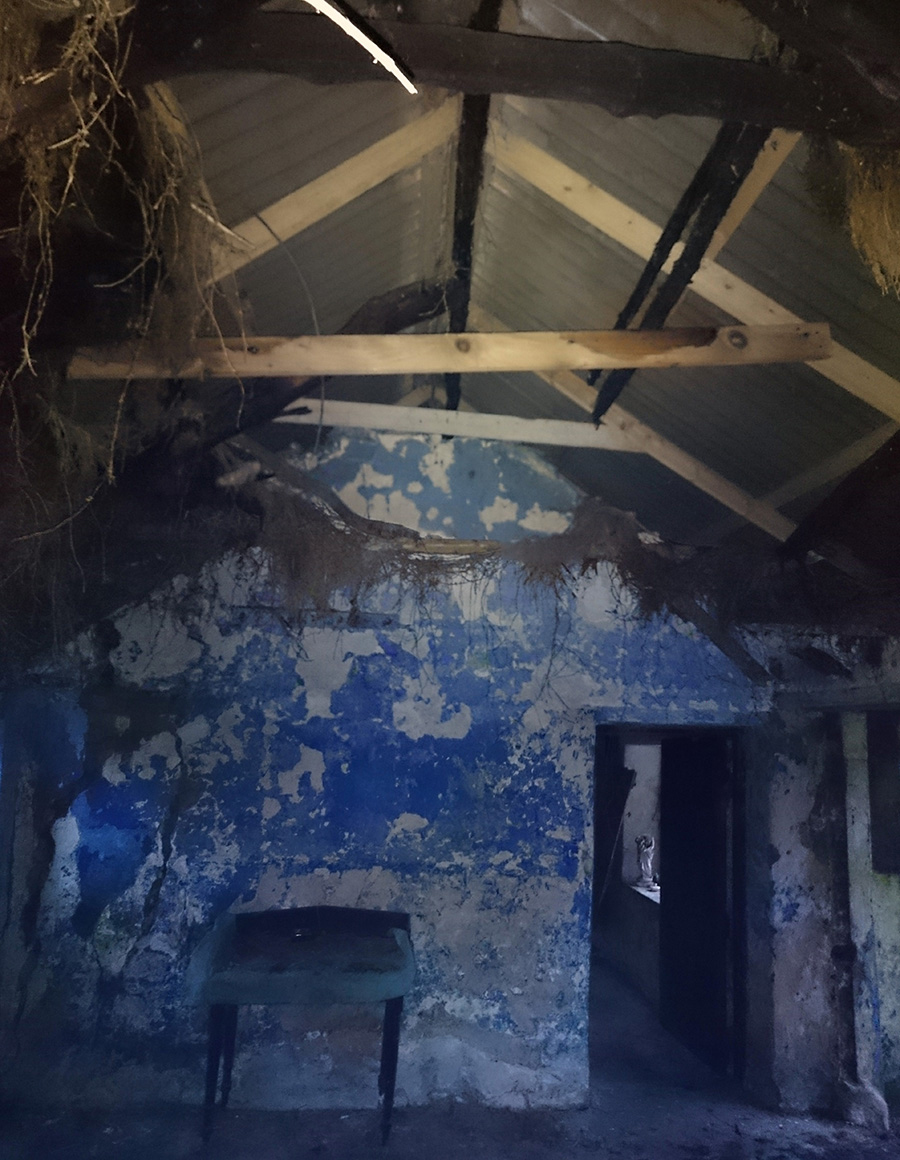
Fig. 35 |
Transverse Wall |
(Note: Large Cracks on the Left where Previous Opening was Blocked Up) |
It was known that there were structural problems with the rear wall. Some were caused by rotten roof timbers pushing the top of the wall outwards. Some were caused by the extensive root system of an ash tree beside the rear wall of the cottage. Some were caused by historic repairs to the stonework. There was a significant bulge to the left of the window where the outer layer of stonework was not tied into the inner layer.
 |
|
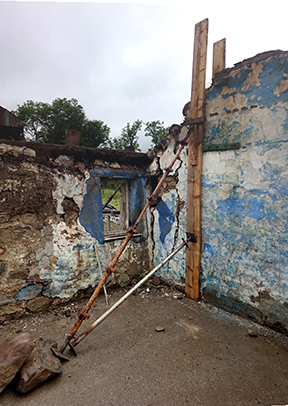 |
Fig. 36 |
Roof Removed |
|
Fig. 37 |
Wall Around Opening Propped |
As is often the case with projects like these, opening up an old building is like opening up a can of worms. It had been hoped that this rear wall could be stablised with spot repairs and minimal intervention. As it turned out, large sections of the wall had to be dismantled. The stones were laid out in sequence as they were removed. While the reconstructed wall could never be built exactly as the original (and it would now bear the signature of these modern masons), it would be as faithful as possible to the original.
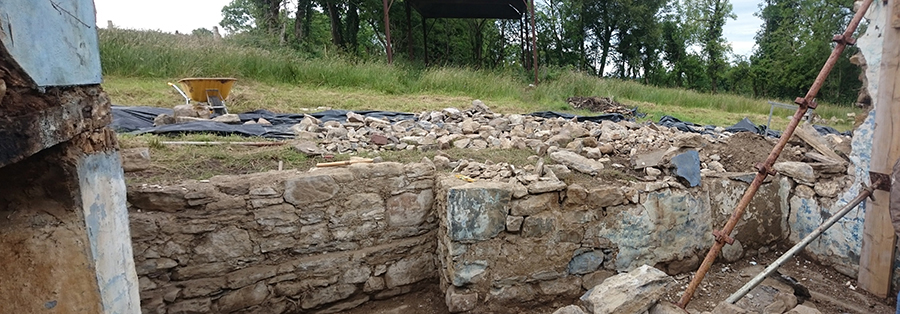
Fig. 38 |
Rear Wall Partially Dismantled |
Stonemasons Seán, Brian and Séamus from Tir Conaill Conservation are very experienced, well used to working with lime. However, they had never worked with earth before. They took to it like ducks to water. Typically masons will mix earth mortars in a trough with spades. However, these guys found that the clay in the sub-soil was so strong and the tiny percentage of quicklime made the mix so stiff, that it was easier to mix by foot - literally dancing the mortar into existence. What a great way to build!
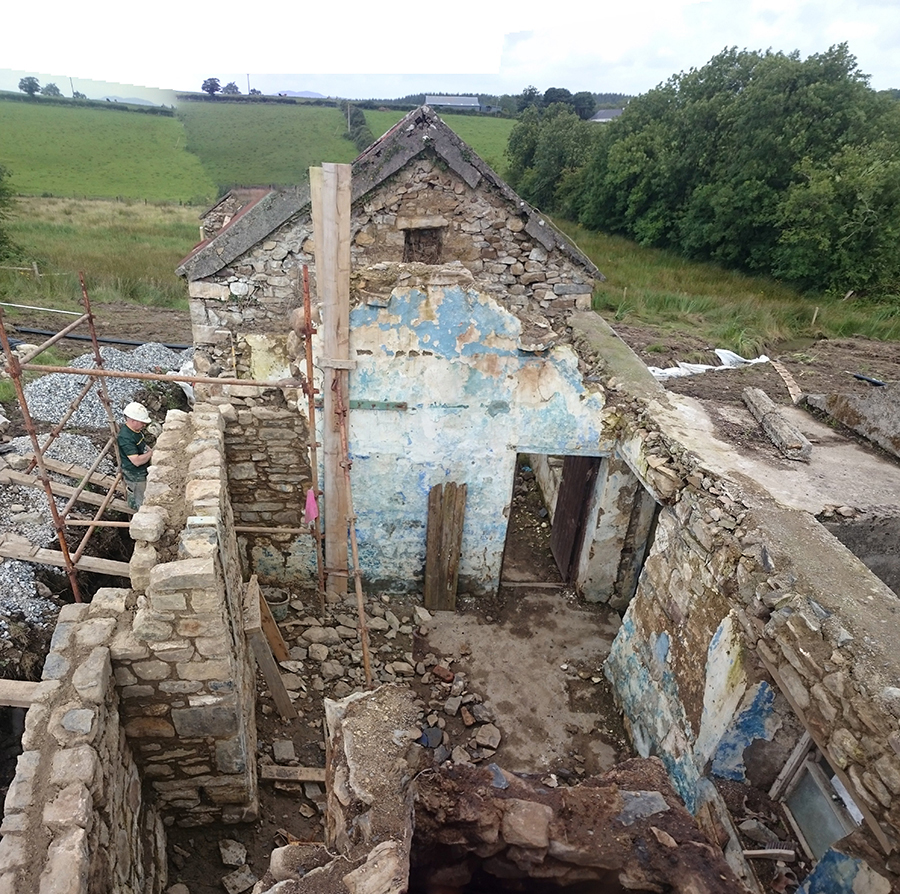
Fig. 39 |
Rear Wall (including Outshot) and Blocked Up Opening Rebuilt |
The major rebuilding of the walls is now nearly complete. Next on the list will be the chimney (in the foreground - Fig. 39). Once the walls and chimney are stablised, the new roof will be erected to provide protection.
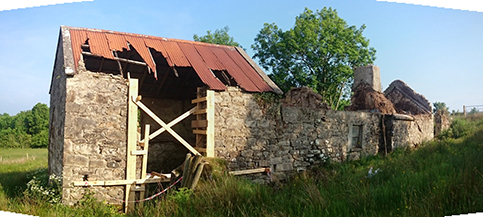
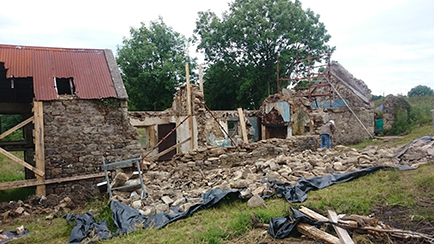
In the photos below, you can follow the progress made on the rear wall of the cottage. The root system belonging to the ash tree (Fig. 40) severely destablised the walls. Removing it proved one of the more difficult tasks on site.

Fig. 40 |
Rear of Cottage |
Note: The Outshot Extending Beyond the Cottage Wall (to the Right of the Window) |
| |
|
|
 |
|
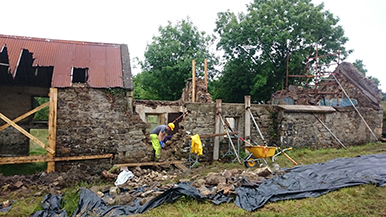 |
Fig. 41 |
Rear of Cottage with Roof Removed |
|
Fig. 42 |
Dismantling of Rear Wall Underway |
| |
|
|
 |
|
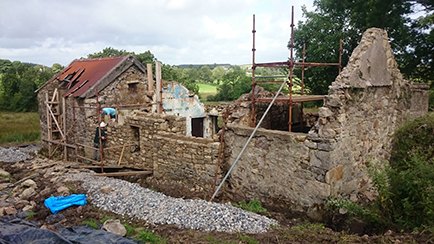 |
Fig. 43 |
Dismantling of Rear Wall Complete |
|
Fig. 44 |
Putting the Finishing Touches to the Rear Wall |
There is still a way to go. But it is extremely satisfying to see the building being restored with such care and expertise ... and using the resources from the site in the traditional way. It is also great to see the earth mortar making such a good impression on these veteran stonemasons. They love building with it. To me, that is the best seal of approval.
Copyright 2016 Féile Butler - Mud and Wood

